TIPS + MORE

OHW Paint is available in Canada!

ORDER DIRECT
It's easy to order! Just email us the list of items you would like to purchase (feel free to screen grab your shopping cart) and make sure to include your name, shipping address and phone number and we will send you a shipping quote.
The prices of all OHW products are as stated on our website. Just pay shipping.
It takes 1-2 business days to process your order and then it is shipped via UPS Ground with an estimated 5 day transit time to Canada.
SHOP IN CANADAPurchase our products directly through our licensed Canadian distributor Emerald Coatings.
We apologize but due to costs and logistics we do not ship overseas.
HYDROGRAPHICS 101
WHAT IS HYDROGRAPHICS?
Hydrographics is the application of a pattern piece of art (film) onto an object in order to customize it, or change its character. Unless you are paying a premium, the “wood” or “carbon fiber” in your car is created by this process as is the camouflaged guns and ATVs you see out in the wild. This application method is decades old, and requires 5 basic ingredients: paint, hydrographic film, water, activator, and a protective clear coat.
We get into more details below, but in summary the part is first painted, (most hydrographic film is semi-transparent, and the base coat influences the overall finished look). The film is then floated on the surface of warm water for a minute or two in order to soften the PVA backing. The upper-facing surface of the film is then sprayed with a hydrographic activator, which turns the film into a liquid. The painted part is then slowly lowered into the film, and the paint chemically bonds to the liquid film, leaving the part “painted” in the design of the film.
Once “dipped”, the part is the gently rinsed in water to remove any excess PVA, and allowed to dry on a rack. Once fully dry, the part is then clear coated for UV and general wear and tear protection, but also to give an array of gloss levels, from wet-look gloss down to a matte clear.
WHERE CAN I USE HYDROGRAPHICS?
Hydrographics film can be used on almost substrate from plastic, metal, chrome, fiberglass, wood, glass and more. You just need to make sure you paint the item with a good hydrographic paint first like our signature One Hit Wonder Paint. Popular hydrodipped items include vehicle parts and trim, tumblers, weaponry, gaming consoles, household items and more. Your imagination is the limit! Basically, if an item can be submerged in water, it can be dipped.
HOW DO I APPLY HYDROGRAPHICS | A STEP BY STEP GUIDE
And now for the fun part. Below is a step-by-step guide on how you can apply your own hydrographic film.
STEP ONE: GATHER YOUR MATERIALS + PREP
THINGS YOU NEED (included in our dip kit):
- Gloves
- Scotch® Pad
- Tack Cloth
- One Hit Wonder Paint
- Hydrographic Film
- Ink Drink Activator
- Standard or 2K Clear Coat
- Things you provide (not included in dip kits): Cleaner/Degreaser, Masking Tape, Dip Tank or Watertight Container (large enough so item can be completely submerged) and Water.

CLEAN item thoroughly with warm soapy water and dish soap, or a solvent based degreaser like Prep-All. Work on small areas at a time, wiping wet with cleaner and wiping dry with clean cloth. Do not allow cleaner to evaporate before wiping with clean cloth as this will leave behind residue. Let dry. SCUFF with a light gray Scotch® pad until consistent dullness is achieved. WIPE with tack cloth to remove any remaining surface dust.
NOTE: The prep is the same for all substrates including plastic*, ALL metal (chrome, aluminum, etc.) wood (use degreaser), glass, bone, fiberglass, rubber, previously painted parts and more. *HDPE plastic requires flame treatment.
PRO TIP! How can you tell if it is HDPE? Look for a stamp in the plastic, contact the manufacturer or try the acetone test. Rub acetone in an inconspicuous spot. If the acetone has ANY effect on the item (it becomes shiny, sticky or matte) it is NOT HDPE. Some common HDPE items can include hard hats, ATV and MX plastics and coolers.
STEP TWO: PAINT
AEROSOL: SHAKE One Hit Wonder aerosol paint well for 1-2 minutes after mixing ball moves freely. Insufficient mixing may cause permanent plugging of the spray head. SPRAY on paper for 1-2 seconds to empty filler tube and release propellant. APPLY paint about 8” from surface with light, even coats and a 2” overlap.
PRO TIP! When you are done painting, to prevent clogs, hold the aerosol can upside-down and spray until clear gas appears. This will work for the Standard Clear Coat aerosols as well.
SPRAY GUN: With a standard mixing stick, STIR One Hit Wonder paint well to remove any heavy residue that may have settled at the bottom of the can. STRAIN paint into spray gun using a disposable mesh paint filter. Set gun pressure to around 22 psi (this is the pressure reading when the trigger is depressed halfway, allowing only air, not paint, to leave the gun). Using a 1.3 or 1.4 tip, APPLY a coat of One Hit Wonder. If part is not fully covered apply a second coat after 5-10 minutes or once the first coat is dry to the touch.
NOTE: One Hit Wonder paint is ready-to-spray and does not require a separate primer. Some colors (as noted in product descriptions work better over a light base.
STEP THREE: SET UP
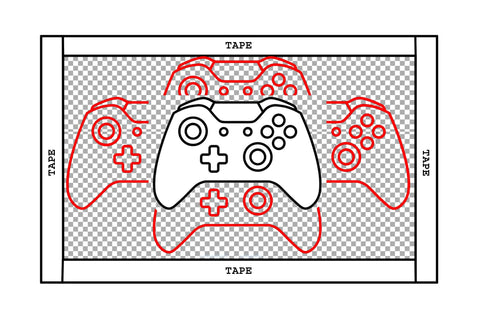
CUT hydrographic film to the appropriate size for the item you are dipping. This is typically an extra 50% of film all around the item. TAPE each side of film with inexpensive masking tape to help keep film in place on the water after activation.
NOTE: Some films need extra "room" to expand (this will be noted in film description. Sometimes only two sides need to be taped and the other two sides will expand to meet the sides of the container or tank.
FILL tank, or watertight container with water between 80° and 90° F (warm tap water).
PRO TIP! There are 2 sides to film, the sticky side and the non-sticky side. Make sure the sticky side is touching the table and is the side that touches the water when laying down your film. To determine which side is sticky, slightly moisten your thumb and forefinger and pinch the film between your fingers. You’ll notice one side is stickier than the other. Remember, STICKY SIDE DOWN!
STEP FOUR: ACTIVATE
LAY film gently on water (sticky side down), being careful not to trap air bubbles.

WAIT 60 seconds for film to soften, and gently spread apart any creases that may occur during this time. Some films can wrinkle up, but will lay flat after approximately 30 seconds.
ACTIVATE with Ink Drink Activator. AEROSOL: TURN spray can horizontally, and using a pass of approximately 12” per second, apply activator with the nozzle fully depressed, 12” from the water. The water should gently ripple. SPRAY GUN: Use a 1.3 tip and set gun pressure between 10-15 psi with the trigger in, and fan fully out. Using a medium pass of approx. 12” per second, apply activator with the trigger fully depressed, between 12” and 18” from the water. The water should gently ripple.
WAIT approximately 10-20 seconds for the film to fully activate before dipping. For heavier ink films, an additional pass may be needed. Make the second pass the opposite direction of the first, similar to a tic-tac-toe pattern.
STEP FIVE: DIP
DIP the painted face of the item into the activated film in a gentle, but smooth motion being careful not to touch or hold any part of the item that you want film to adhere to. Once fully submerged, SHAKE item slightly in the water to release excess film and then REMOVE from water.
NOTE: Every item is different but for most objects, you’ll want to dip it in at a slight 30° angle.
RINSE part with fresh lukewarm water (shower not jet), until the part no longer feels slippery to the touch. Be very gentle touching the part to avoid smearing the film! One rinsed thoroughly, let DRY on a rack, or with compressed air. Do not dry with a cloth or towel!
STEP SIX: CLEAR COAT
Make sure part is dry and dust free (use tack cloth).
STANDARD CLEAR AEROSOL: SHAKE vigorously for 1-2 minutes. HOLD about 8” from part and APPLY one medium/ light* coat. WAIT 10-15 minutes. APPLY second wet* coat.
2K CLEAR: Use a 1.3 or 1.4 tip and set gun pressure to 28 psi. STIR clear THOROUGHLY with a standard mixing stick. MIX the clear and the activator/hardener with ratios stated on can. Stir together for at least one minute to ensure complete mix. STRAIN mixed clear and activator into the spray gun using a disposable mesh paint filter. APPLY one medium/ wet* coat. WAIT 15 minutes. APPLY second wet* coat.
2K CLEAR AEROSOL: Activate can according to instructions on label and then follow regular 2K Clear instructions. Be aware that once the 2K Clear Aerosol is activated, it will only spray for 4 hours as it will begin to harden.
DRY TIMES: Standard Clear Coat should be tack-free within 30 minutes and safe to handle within 3 hours. 2K Clear Coats should be tack-free within 3 hours. Let stand for at least 12 hours before handling and polishing. If parts need to be handled with pressure for reassembly, we suggest waiting at least 24 hours to avoid damaging the clear coat.
*If using matte clear, please apply LIGHT coats.
PRO TIP! Store film, One Hit Wonder paint, Ink Drink Activator and Clear Coats in a cool, dry place.
UNDER ACTIVATION + DRY WEATHER

Does this sound familiar…
“I am using the SAME paint, the SAME film, the SAME activator, SAME water temperature…EVERYTHING IS THE SAME. So why all of a sudden does my film look under activated?!?"😫
It’s not you. It’s winter.❄️
The air this time of year can get pretty dry (chapped lips anyone?) and the resulting lower humidity levels will have a dramatic effect on the speed of your activator evaporation. Many of the active chemicals in activator that liquify your film will evaporate quicker when it’s dry then they will in more humid conditions. So what to do? 🤔 Instead of adjusting your activator gun (because it's worked perfectly up until now, right?), we suggest adding an additional pass or spraying a slower pass.
To test if you’re activating enough, first do the finger tip test on a small piece of film. After you activate the film, wait about 10-20 seconds and dip your finger onto the surface the film and pull up. 👇You should have a thread of about 2-3 inches of film (like a slimy tentacle) and then you will know it is correctly activated.
Make sure you are using the best film activator for your hydrographic dipping.